Showing posts with label butterfly. Show all posts

December 3, 2011

Butterfly Party Pics!


Afternoon tea was a yummy selection of treats with labels from Occasion By Design.


How ca-ute is my glass drink dispenser from Shoppe With Lily! - LOVE it!


We had all kinds of butterflies fluttering for decoration including some very sweet paper ones from Coco & Chloe


Remember I told you I had made bunting for the party but it would be used in a more 'un-traditional' way??... Anyone for a game of Butterfly Badminton? With a bunting banner net, butterfly net bats and balloons for balls all the kids (big and small) had a play!


We had a few laughs with a butterfly Pinata too (that's me in the white shirt freaking out about getting hit with the bat!)


Happy Birthday was sung to the birthday girl before she blew out the candle on her butterfly cake and she tells me that she had 'the best party ever!'


Happy Birthday Miss Milla, we love you LOTS!

Giggles

November 16, 2011

Butterfly Party - Bunting!

Yep - if it's a Giggleberry family party of any sort you'll find some bunting around :)
Just last week I finished the bunting for Milla's butterfly party. Using the fabric that started the whole theme and colour inspiration in the first place: 'Kumari Garden Sacha Pink'


matched with some 'Kumari Garden Marala Pink' fabric I'm pretty please with the result.


I have plans for this bunting that isn't the 'traditional' way of using bunting - but I'll leave that as a little surprise.
Giggles

November 10, 2011

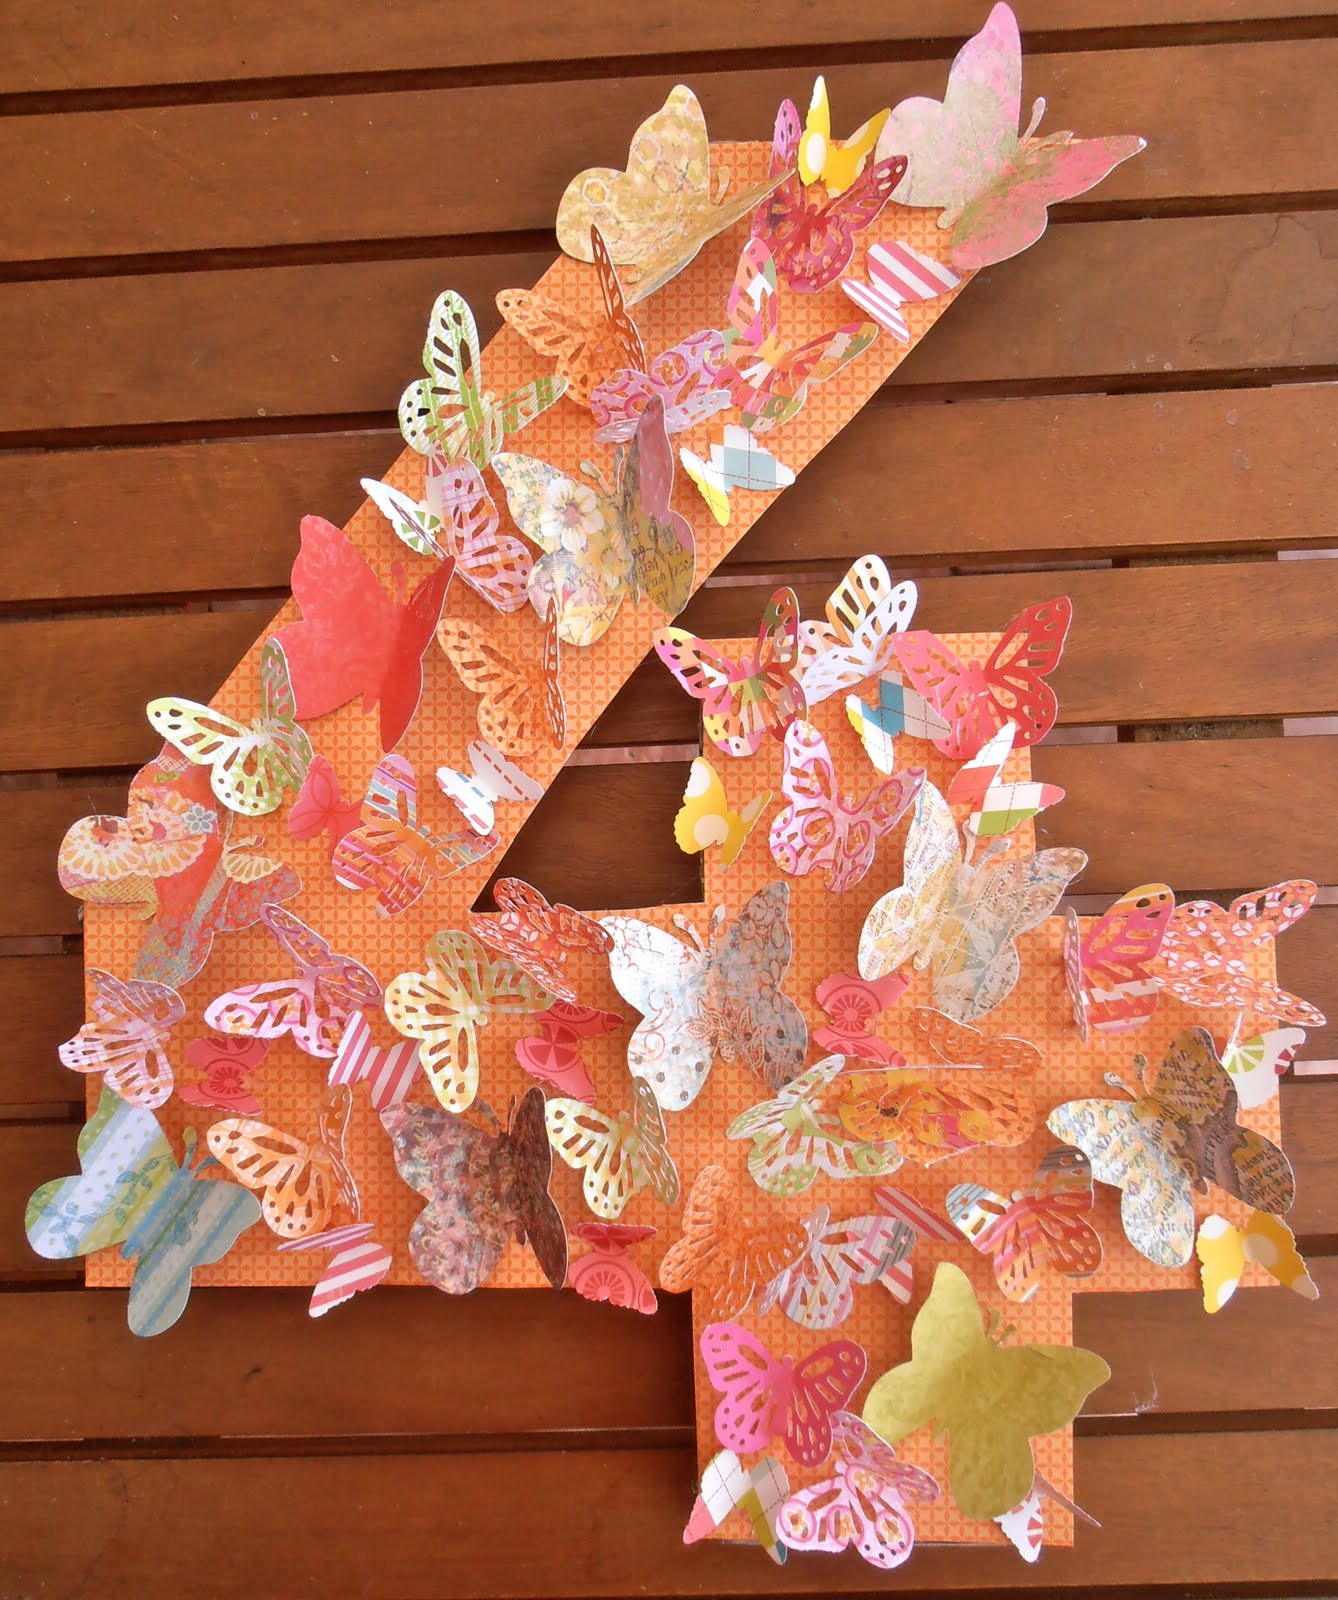
Butterfly Party - Number Wreath!

If you have been a long time reader here you'll know I like a good wreath or similar hanging on the front door to welcome guests. Remember my Rainbow Ribbon Wreath, Thong Wreath from Australia Day, Halloween Wreath and the Soccer flag I made for Harris' last b'day?... For Milla's Butterfly Party in a few weeks I wanted something fun, butterfly-ish but also really like the idea of the Number Wreaths I've seen around - so with my hot glue gun at the ready I got crafting.


Onto an old cardboard box I free hand drew the number 4. I then cut it out and used it as my template to cut out another four the same and hot glued them all together just to make it nice and strong.


Then did the same again onto scrapbooking paper in a colour to match the party and glued it to the top of the number (if you were keen you could go around and put paper on all the sides too but I figure no one will see there so I didn't bother)


Once that was all dry I took my three sizes of butterfly cut outs I had left over from the other little projects from this party and folded them all in half down the body so the wings look like they are fluttering. Starting with the largest size paper butterflies I hot glue gunned just the body (let the wings stand) sporadically all over the number.


Next I took my middle sized paper butterflies and glued away.


Then lastly filled in all the little gaps with my tiny paper butterflies.


With a ribbon attached to the back it's all ready to hang - Yay!


Giggles

November 3, 2011

Butterfly Party - Butterfly Straws!

I know straws aren't *needed* for a party but almost all kids like a fun straw to sip their drink from and these are such a cute and super easy way to continue a theme for a party into the table ware I had to have a play and thought you might like to know how to do it.

YOU'LL NEED:
* Straws - plastic, paper, stainless steel, striped, spotty, white, coloured - whatever you have or can get your hands on or suits your theme is perfect.
* Scissors
* Paper shape - in my case butterflies but you could do cars, hearts, rainbow, a letter or number... anything to match your theme.
NOTE: I bought my shapes from HERE all pre cut and in the colours I wanted to make life super easy. But if you want you can buy a craft punch the shape you want and some scrap booking paper in the colours/patterns you need and make the shapes yourself.


Step 1.
Take your shape and fold in half.


Step 2.
With your scissors snip two little slits across the fold into the shape. They should be approx half an inch apart depending on your shape size.


Step 3.
Unfold shape and insert your straw though the two slits so the shape is held in place on the straw.

Back:


Front:


Told you is was easy!!


And cute too!!

Giggles

October 26, 2011

Butterfly Party - Invitation: Part 2!

Step 1 of the invitations for Milla's Butterfly Party posted HERE was lots of fun and super easy so now to tell you about step 2 of the process... getting that photo and the party info to come together!!

I like the idea of having a little fun with the words on an invitation, it's a great way to get the guests in the mood for the day. So while blow drying my hair one morning (that's when I seem to come up with all my ideas) I played around with some butterfly words and the party details and came up with the following for the invitation....

My oh my,
we'd love you to flutter on by.
To celebrate with the little caterpillar,
who is now 4 year old butterfly Milla!

Join us for afternoon tea on
Saturday 3rd Dec at the butterfly nest
address
From 1:30 - 3:30 for fluttering butterfly fun!


I know, I know, total win with Milla rhyming with Caterpillar!!

So then off to Etsy I went on the hunt for someone, much better with graphic design than me, to turn all these bits into a pretty invite. I fell in love with THESE Butterfly Number invitations from Luna Petunia Designs and grabbed them right away. Denise, who is the clever one behind Luna Petunia Designs, was absolutely wonderful with the designing - I just emailed her the photo and the wording, told her our colour theme and away she went - I'm thrilled with the result and Milla thinks they are rather fabulous too - what do you think??


Giggles