Showing posts with label cake decorating. Show all posts

February 11, 2013

Burger Birthday Cake!

It's no secret around here that I like a good excuse to make a fun cake. So with hubby's birthday last wednesday I let the kids choose what type of cake he should have and was thrilled with their choice... a Cheeseburger Cake!!

This cake is rather simple to put together for such a funky finished product.
You will need:
1 round butter cake
1 brownie mixture made into one large round brownie (NOTE use the same round tin as you did for the butter cake)
1 packet of Jolly Rancher lollies (you need the red and green ones)
1 packet of Starburst Fruit Chews (you need the yellow ones)
Pine nuts
Butter icing coloured light brown (mix red and blue colouring until desired colour is achevied OR use a tiny amount of Wiltons brown gel colouring)
Slice the butter cake right through the middle with a serrated knife top create the burger buns. Place the bottom 'bun' on your cake plate with a tiny bit of icing between the cake and plate so it doesn't slip around. Place the large round brownie 'meat pattie' ontop of the bottom 'bun'. Then on goes the top of the butter cake as the top burger bun - you should now have one pretty basic looking 'burger'.
With your icing coat the top cake and try to smooth it as much as possible to look like a burger bun. Next up is the fun part - the tomato, lettuce and cheese! With the red and green Jolly Ranchers and the yellow Starburst chews you need to roll them flat with a rolling pin or squish them out with your fingers (warning this can become sticky!). Once they are rolled out flat-ish you will need to shape them a little. With the red ones make them a little round like a slice of tomato. The yellow ones can be cut into triangles to create slices of cheese and the green ones just need to be wrinkled up a bit to look like lettuce leaves. Now have fun just poking the little bits and pieces into the cake between the 'meat' and the top burger 'bun' like in my pictures.
Last, but not least, sprinkle a handful of the pine nuts ontop of the cake to create sesame seeds on your bun - simple!

Now pop it in the fridge and have a little giggle about the size of the 'Burger' next to the rest of your groceries!

This was lots of fun to make and Master Giggleberry loved helping me (and snacking on the left over Starburst chews). We poked a few sparklers in the top & sang happy birthday for hubby after dinner that night and couldn't help snapping a few fun pics after we had all had a slice.

Add this one to your cake 'To Do List' - you won't regret it... too much fun!


Giggles

February 29, 2012

Firefighter Party - Cake!

This whole Firefighter theme for Harris' party on Friday night came from Harris spotting a fire engine cake in one of my cake books so of course that will be the cake I will attempt (wish me luck).
I have found a great 'How To' video (below) on YouTube that I plan to follow and have already hit the supermarket for all the bits and pieces I need for it.... finger crossed it gets the pass mark by the kids!


I plan to present the cake on my gorgeous black cake stand I got from Tracey Lau so I thought I would tie it into the firefighter theme a little bit by adding a length of yellow and black Washi Tape I found from The Kawaii Notebook - so simple but effective, don't you think?


Two days to go...
Giggles

October 7, 2011

Gluten Free version of the KitKat & Smartie Cake

Felicity, my step daughter is turning 11 this Sunday (goodness where did those 11 years go?) so to celebrate we had a little get together with family for a BBQ dinner last night. Nothing fancy, just a good excuse to blow up some balloons, make some paper chains (a great way to use up the growing pile of kids artworks) and of course eat cake!

Felicity is on a strict gluten free diet so when choosing her birthday cake each year it's tricky to find something yummy, fun and diet friendly. When I spotted the KitKat and Smartie cake that is doing the rounds at the moment HERE I LOVED it and had a little think about how I could do a gluten free version. Drum roll please....
Ta Dah!!


With a yummy (tried and tested) moist gluten free chocolate cake mix from Coles, some gluten free choc wafers and 2 bags of The Natural Confectionary Co. jelly beans it was looking rather swish, if I do say so myself.


Then add the gorgeous and fun paper Happy Birthday cake bunting I scored on Raspberry Lime Paperie's facebook sale recently and the masterpiece was complete!


And what a gorgeous excuse to use my pink hobnail cake stand from RubyJu for the first time!


Needless to say it was enjoyed by all!
Giggles

November 11, 2010

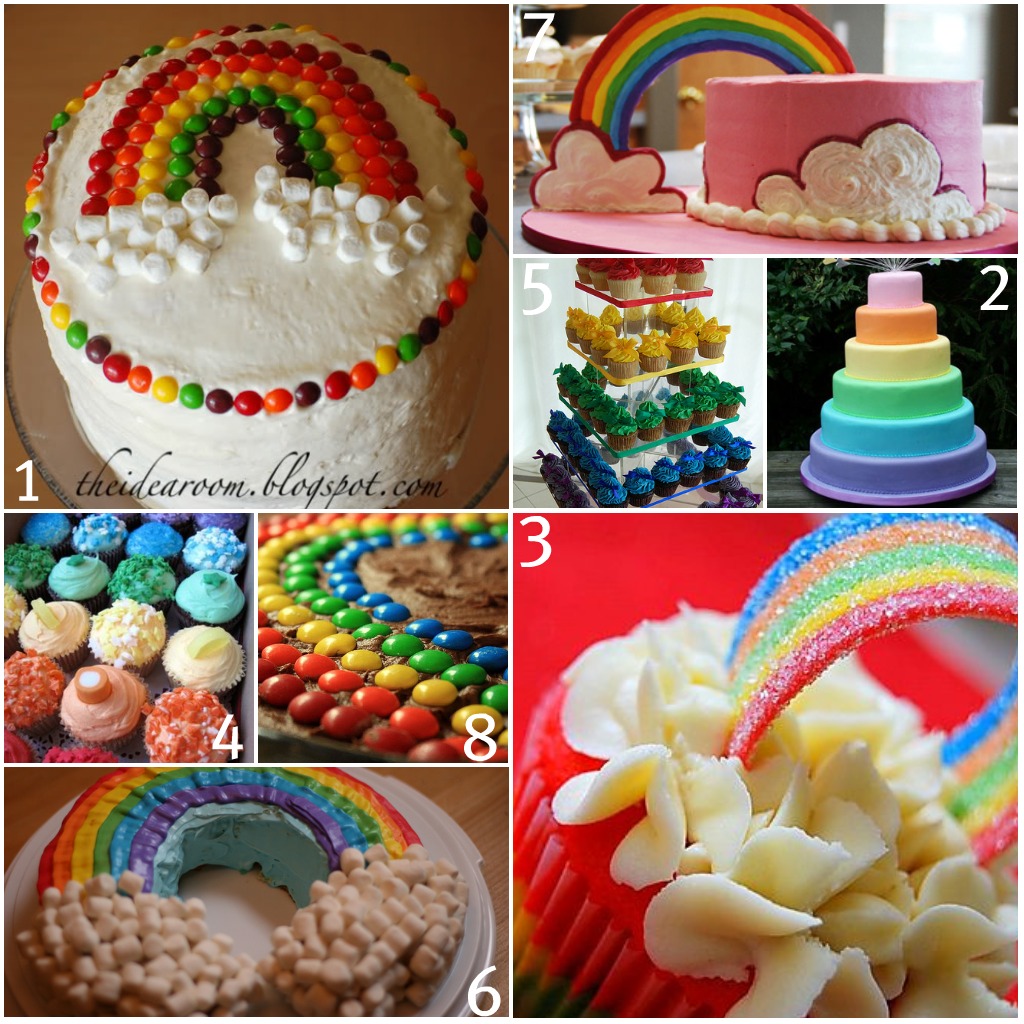
Rainbow of Ribbons - birthday cake!

99% of you who know I am planning a Rainbow of Ribbons party would be forgiven for assuming that of course the cake will be one of those AMAZING rainbow layer cakes that are popping up everywhere.


Truly I think these are just stunning not to mention super clever!! (the above pic is from HERE with the how to for the cake too) One day I do want to make one just to say I had but for Milla's upcoming party I can't help but want to 'be different' from most other rainbow parties so I have gone another route with the cake.
Now, I don't want to promise anything as spectacular as the famous rainbow layer cakes but I will have fun making what I have planned and am going to keep it a surprise.... only 3 wks to wait, you'll be right ;)

In the mean time I thought I'd share with you some fabulous rainbow cakes I found while searching for Milla's cake inspiration - Enjoy.


1. The idea room
2. Wedding Cake Pictures
3. Snag Wire Media
4. Crumbs and Doilies Cupcake Blog
5. Cupcakes take the cake
6. Rainbow Cake
7. Rainbow Cake
8. Rainbow Cake


Oh and check out these fabulous candles I found for Milla to blow out - PERFECTO!! I bought them from HERE


Giggles

March 24, 2010

Make your own bunting decorated birthday cake!


Remember my post (HERE) from just the other day about Birthdays with Bunting? In the post was a great idea for a bunting decorated birthday cake I found over at Little.Lovely. blog. Such a simple yet such an effective way to decorate a cake for your next party, no matter what the theme!
So to make it even easier for us guess what has just popped up onto Little.Lovely. blog.... How to instructions! So you can make your very own - How to make bunting for a child's birthday cake! Yay!

All you need is:
- Ribbon
- Two sheets of patterned paper in coordinating colours
- Scissors
- Pencil
- Double sided tape

Then just by following the super simple steps and photos found HERE you're cake will be looking very festive indeed!


I adore this idea! With a quick stop into the scrapbooking papers section of your local craft shop just imagine the different colours, patterns and themes you could do it for... Red, yellow & blue papers for a circus party, pink floral papers for a girly tea party, bright green patterned papers for a monster party, pink and purple sparkly paper for a fairy party.... I could go on and on!

I had a quick play with some pink and mint coloured papers I had lying around and cut smaller triangles attached to a shorter ribbon to use on cupcakes - cute hey?


Giggle